Did you know that you can navigate the posts by swiping left and right?
Writing a plugin for Pitivi I
24 Aug 2017
. category:
tech
.
Comments
#gnome
#pitivi
The code I have written have been reviewed a lot. So these days I have been completing some minimal details in my code. My patches that implement the plugin manager for Pitivi has been accepted. The next bunch of patches that are on revision are the ones related to the developer console plugin. I want to thank the dedication that Alexandru Băluț (aleb) put to review my code, because this improve the software. While aleb was reviewing my patches, I have been writing some documentation that will be published later in The Pitivi Developer Documentation, but before that I want to share a simple example about how to write a plugin for Pitivi.
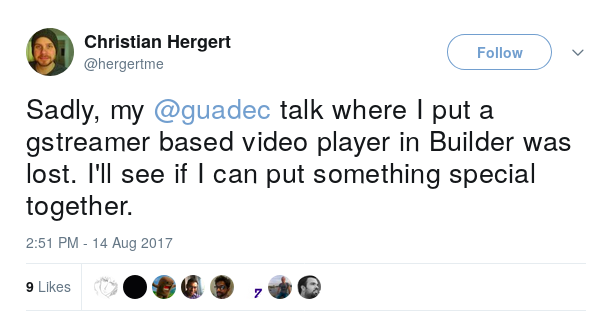
At GUADEC 2017, Christian Hergert gave a talk named “State of the Builder”. As I have said in my previous post this was one of the conferences I was most interested about. Unfortunately, there was a problem with the audio recorder and the video of his talk has not been published on Youtube. But I remember he showed a plugin in which you can play a video in GNOME Builder using GStreamer.
Today I feel on the mood to do something similar. So why not to write a plugin to edit code in Pitivi?

Yep… this is a joke and a tutorial at the same time. Let’s start.
Plugins location
User plugins that are from third-party developers should be placed at $HOME/.local/share/pitivi/plugins/.
The .plugin description
The first step to create plugin is to create a plugin description file. By convention, this file should be named module-name.plugin.
[Plugin]
Module=code_editor
Name=Code Editor
Description=A plugin to edit code in Python.
Authors=Example <example@example.com>
website=http://example.foo
Copyright=Copyright © Example
Loader=Python3
For a complete example of a plugin description file, see PeasPluginInfo documentation.
Creating a simple Python module
The only interface available to implement by Pitivi extensions is the Peas.Activatable. Extension modules should implement this interface and internally as soon this module is loaded Pitivi will set to it the object attribute to the Pitivi application object, which will give you access to almost everything.
Now create the file hello_world.py in the same directory of hello-world.py.
class CodeEditor(GObject.GObject, Peas.Activatable):
    __gtype_name__ = 'CodeEditor'
    object = GObject.Property(type=GObject.Object)

    def __init__(self):
        GObject.Object.__init__(self)

    def do_activate(self):
        print("Hello world!")

    def do_deactivate(self):
        print("Bye!")
You’ve just created your first plugin! It will print a message in the terminal when you activate or deactivate the plugin.
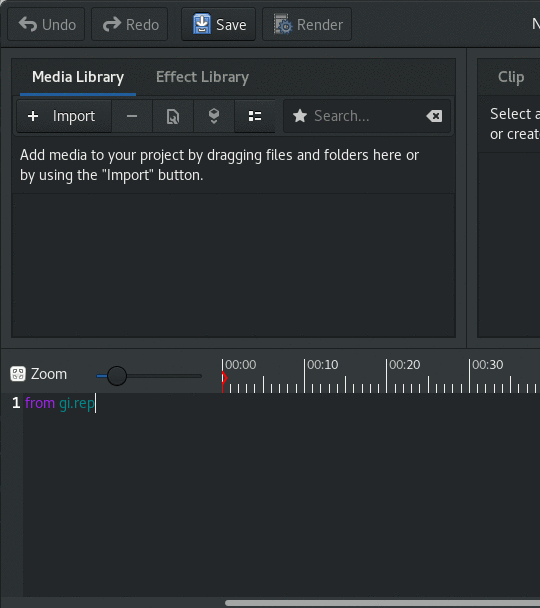
Replacing the Pitivi Timeline by a GtkSourceView
The plugin we wrote was bery simple, now we want to do something more complex.
We will rewrite our __init__ function to look like this:
    def __init__(self):
        GObject.Object.__init__(self)
        self.app = None
        self.source_view = None
        self._timeline = None
where self.app will represent the Pitivi application.
Now we want to do something useful when the plugin is activated. So we will replace this method by this:
    def do_activate(self):
        API = self.object
        self.app = API.app

        self._timeline = self.app.gui.timeline_ui.get_child_at(0, 1)
        self.app.gui.timeline_ui.remove(self._timeline)

        self.source_view = GtkSource.View()
        language_manager = GtkSource.LanguageManager()
        language = language_manager.get_language("python3")
        buf = self.source_view.get_buffer()
        buf.set_language(language)
        self.source_view.show()
The API object contains the Pitivi application, so we assign it to self.app just to access it without typing too much. Then we get the Timeline object that is the widget that displays a representation of the GES.Timeline. Then we create a GtkSourceView that is the widget that provides a text editor with features like highlighting (among others). Then we set to it as “python3” as the default language and then set it to the buffer of the GtkSourceView. Finally, we show the source view.
Now we wish to add just these lines to have a better code editor:
        self.source_view.props.show_line_numbers = True
        self.source_view.props.show_right_margin = True
Then the function do_deactivate is called every time we turn off the switch in the plugin manager. We destroy the GtkSourceView so it is removed from its parent, too. Finally we reattach the timeline so the timeline is visible again.
    def do_deactivate(self):
        self.source_view.destroy()
        self.app.gui.timeline_ui.attach(self._timeline, 0, 1, 2, 1)
        self.source_view = None
That’s it. You can do more if you want like adding support for more languages or a button to export the code as a file. You can also add preferences to the Preferences Dialog and add new settings. With this example I want to show you that you can go as far as you want just with imagination and some knowledge about programming.
Full code
from gi.repository import GObject
from gi.repository import GtkSource
from gi.repository import Peas


class CodeEditor(GObject.GObject, Peas.Activatable):
    __gtype_name__ = 'CodeEditor'
    object = GObject.Property(type=GObject.Object)

    def __init__(self):
        GObject.Object.__init__(self)
        self.app = None
        self.source_view = None
        self._timeline = None

    def do_activate(self):
        API = self.object
        self.app = API.app

        self._timeline = self.app.gui.timeline_ui.get_child_at(0, 1)
        self.app.gui.timeline_ui.remove(self._timeline)

        self.source_view = GtkSource.View()
        language_manager = GtkSource.LanguageManager()
        language = language_manager.get_language("python3")
        buf = self.source_view.get_buffer()
        buf.set_language(language)

        self.app.gui.timeline_ui.attach(self.source_view, 0, 1, 2, 1)
        self.source_view.show()

        self.source_view.props.show_line_numbers = True
        self.source_view.props.show_right_margin = True

    def do_deactivate(self):
        self.source_view.destroy()
        self.app.gui.timeline_ui.attach(self._timeline, 0, 1, 2, 1)
        self.source_view = None
As I said this was in part a tutorial and a joke at the same time. So I hope you have enjoyed the post and also I hope the plugin manager gets merged as soon as possible. I am writing serious documentation that will explain more about how to write plugins in Pitivi. I also want to thank to Christian Hergert to take his time to review my patch for Libpeas.

Fabián Orccón is an awesome person. He lives in Perú, the land of the Incas.